
CI/CD Pipelines
A Beginner’s Guide to Setting Up CI/CD Pipelines for Web Projects
December 1, 20246 min read
Continuous Integration (CI)/Continuous Delivery (CD) pipelines are the heart of modern application and software development. CI/CD pipelines have changed software development processes by allowing businesses to automate key steps in the development lifecycle.
CI/CD pipelines enable businesses to accelerate their software delivery, improve quality, and adapt quickly to evolving market demands. As the trend of developing custom web applications and software is constantly rising, mastering CI/CD pipelines is essential for developers and IT teams of every business.
In this ultimate guide, we will embark on a journey to learn more about CI and CD. Also, we will have a look at a step-by-step approach to setting up CI/CD pipelines for web projects.
Let’s begin!
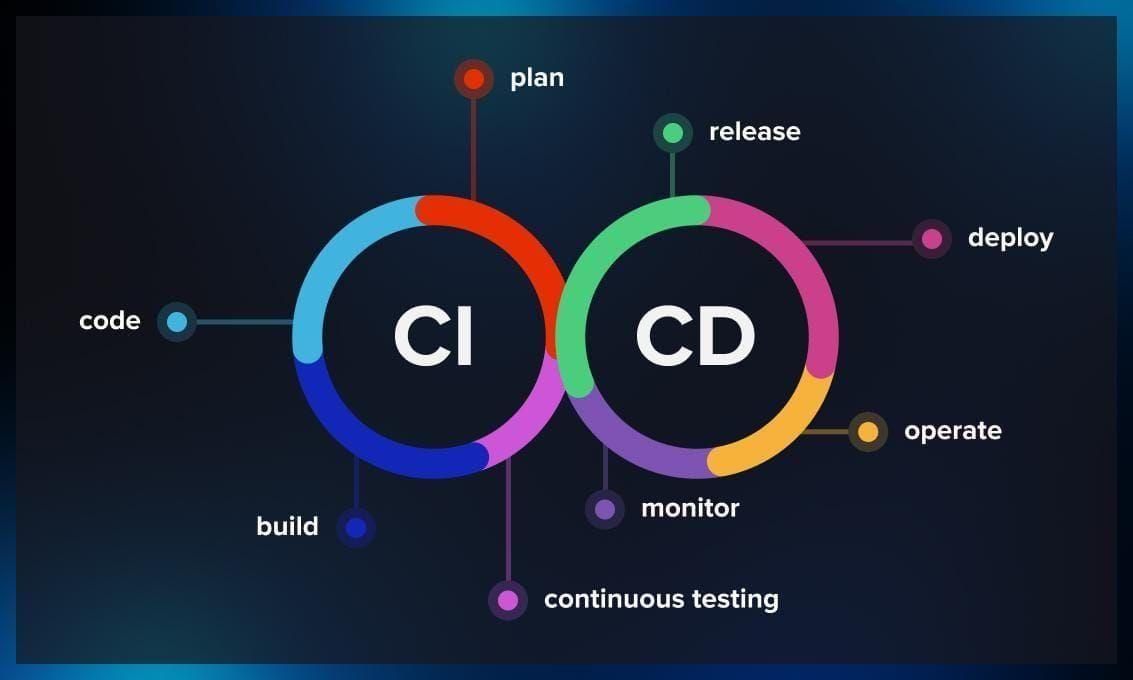
What is CI/CD?
Continuous Integration (CI) is a software development practice in which developers integrate code changes in a central shared repository, often multiple times a day. An automated process is initiated every time a code is integrated. This process automatically builds the code, runs tests, and identifies bugs earlier. The main purpose of CI is to detect and solve integration earlier in the development cycle. This improves development collaboration and reduces the chances of integration issues that may arise when multiple developers are working on the same project. Some key benefits of CI are:- Early detection of bugs in code and integration issues
- Faster development process
- Increased collaboration with code-sharing
- Decreases the risk of human errors while application release
- Ensures consistent release of updates and new features to users
- Ensures that the same deployment process is used across all environments
Important CI/CD Components
Before you can start setting up a CI/CD pipeline, you must know about some important components of a CI/CD pipeline. Integrating these components is important to ensure seamless development, testing, and deployment of an application. Let’s learn about some essential components in detail; Source Code Repository The source code repository is the central hub where all your codes are stored. It is also known as a version control repository. Some popular source code repository platforms are GitHub, Bitbucket, GitLab, and Harness Code. Build Automation Build automation is where your codes are compiled or built automatically. In web projects, this may involve bundling JavaScript files, running Python scripts, linting with ESLint, running Jest tests, and other tasks. Jenkins and TravisCI are commonly used build automation tools. Automated Testing After the build, each code is tested automatically to ensure it performs as expected. Unit tests are performed to validate individual functions or components separately. Integration tests then verify the interactions between different components. Artifact Repository An artifact repository or artifact manager are software application that stores and manages build artifacts during the development process. Amazon ECR and DockerHub are a common example of artifact repositories. Compliance and Security Check Tools like Nessus and OWASP ZAP conduct automated compliance and security checks to identify vulnerabilities in infrastructure and codes. These scans ensure that security issues are detected and resolved earlier in the pipeline.Building a CI/CD Pipeline: Step-by-Step Guide
Next up, we will go through setting up a basic CI/CD pipeline for web projects step-by-step;Step 1: Set up a Git repository
- First, you need to create a Git repository to store your source code. You can use platforms like GitHub, BitBucket, or GitLab as they have a user-friendly interface.
- Your project must be version-controlled using Git. To do that, Initialize your repository and push it to a platform of your choice.
- Use GitFlow to define your branching strategy and organize codes efficiently.
Step 2: Configure a CI Server
- Choose a CI server and install/configure it according to your infrastructure requirements. You can pick one from Jenkins, CircleCI, TravisCI, or any other.
- Integrate your CI server to your Git repository and configure it to trigger automatic builds when code changes are made.
- Specify build runners or agents to execute code build and test.
Step 3: Automate Builds and Tests
- Set up build scripts to automatically compile codes, run unit tests, and build your application. You can use build tools like Gradle or Maven.
- Next, configure your CI server to run these build scripts whenever changes are made in the code repository.
- Integrate a static code analysis tool with your build scripts to ensure consistent code quality. SonarQube is an ideal tool to do that.
Step 4: Configure Artifact Creation and Management
- Define a process for creating artifacts, such as creating deployable binaries or packaging your application into Docker images.
- Create a dedicated artifact repository for storing and managing your artifacts. You can use AWS S3, Docker Hub, or a private Nexus repository.
- Version artifacts to ensure their traceability and the reproducibility of deployments.
Step 5: Set up Deployment and Rollbacks
- Implement the application deployment process by writing the deployment process script using tools like Kubernetes, Ansible, or Terraform.
- Create deployment pipelines to move artifacts after successful testing from one environment (like staging) to the next environment (like production).
- At last, integrate a rollback strategy. This strategy helps to quickly revert to a previous version of the application in case of production issues.